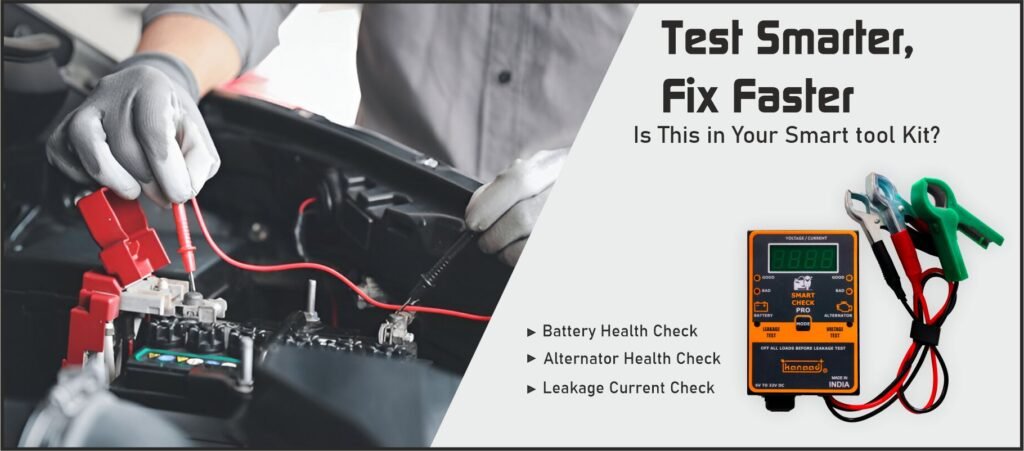
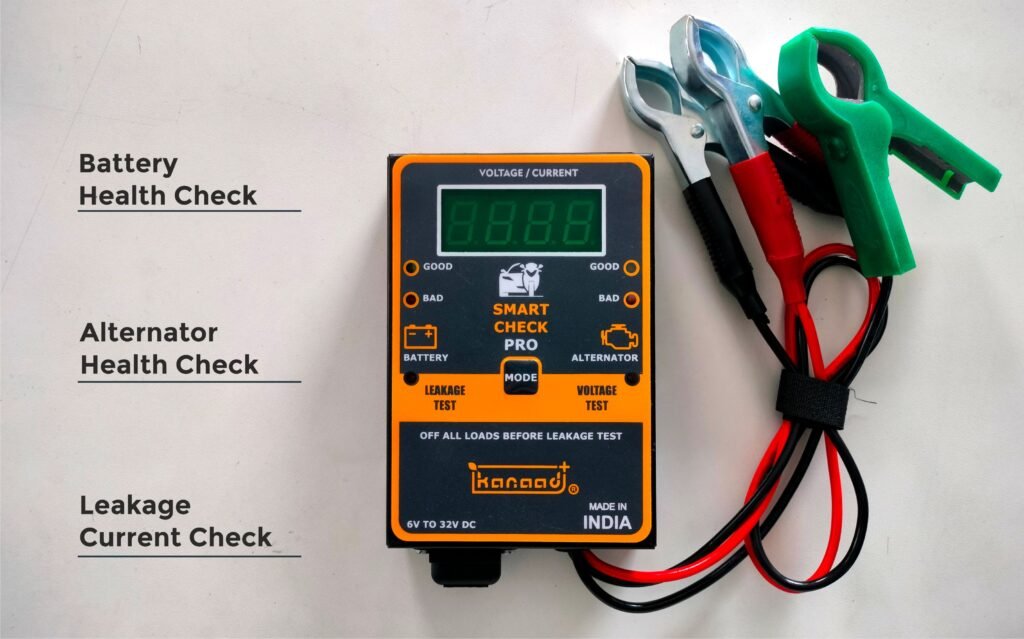
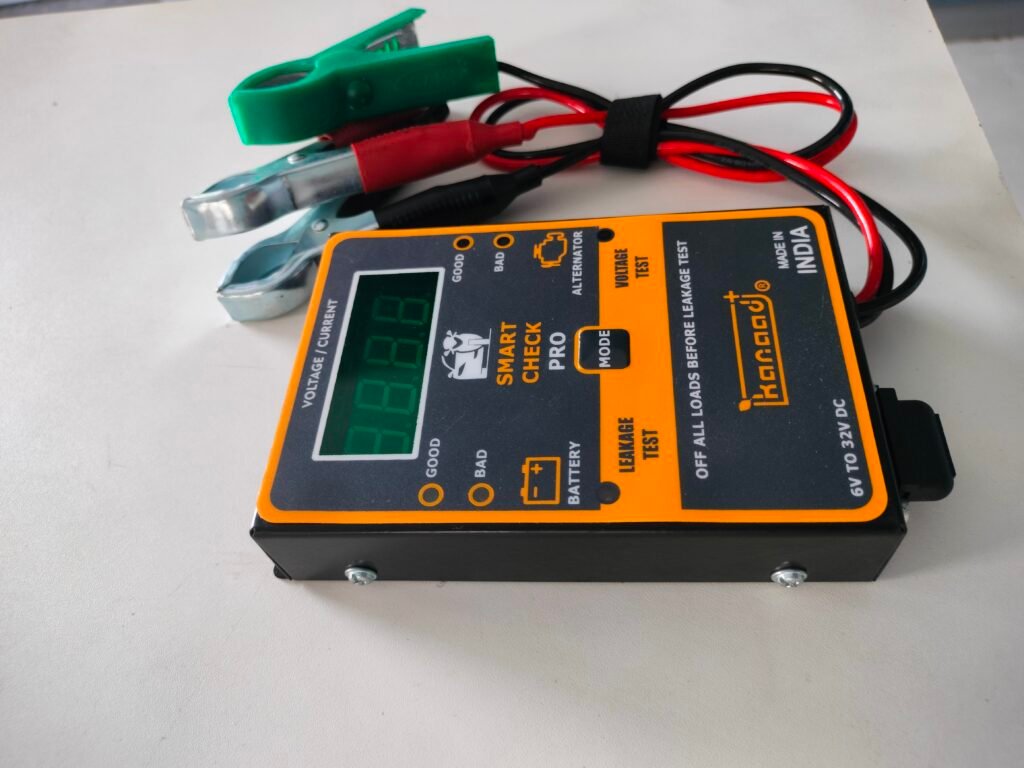
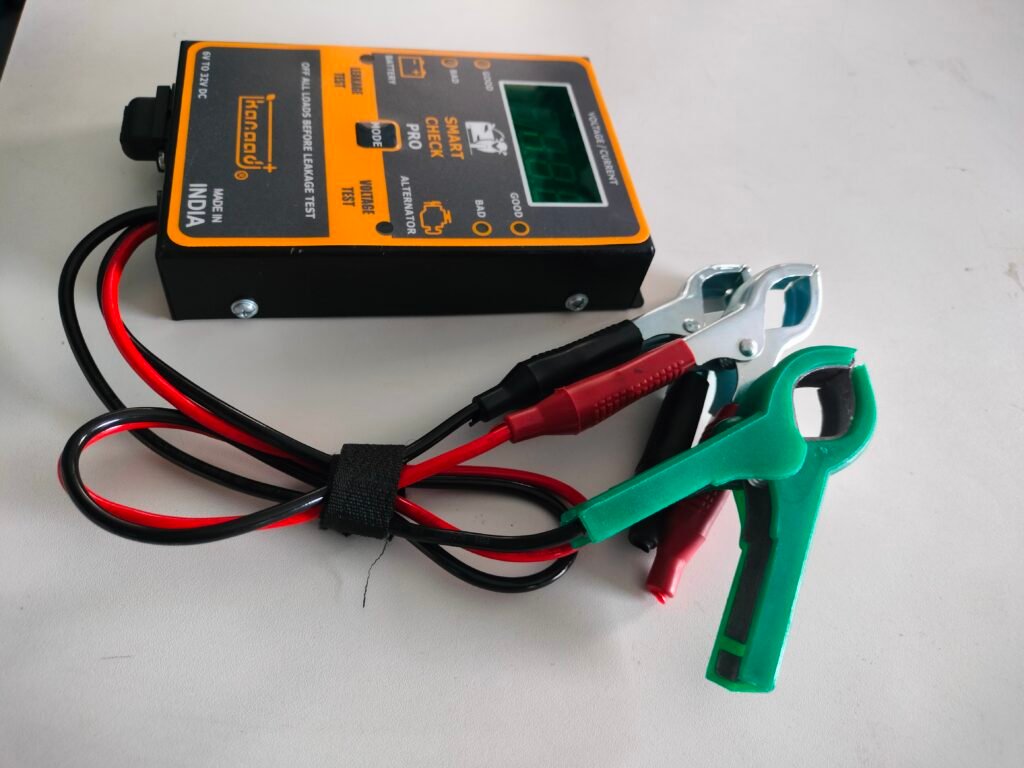
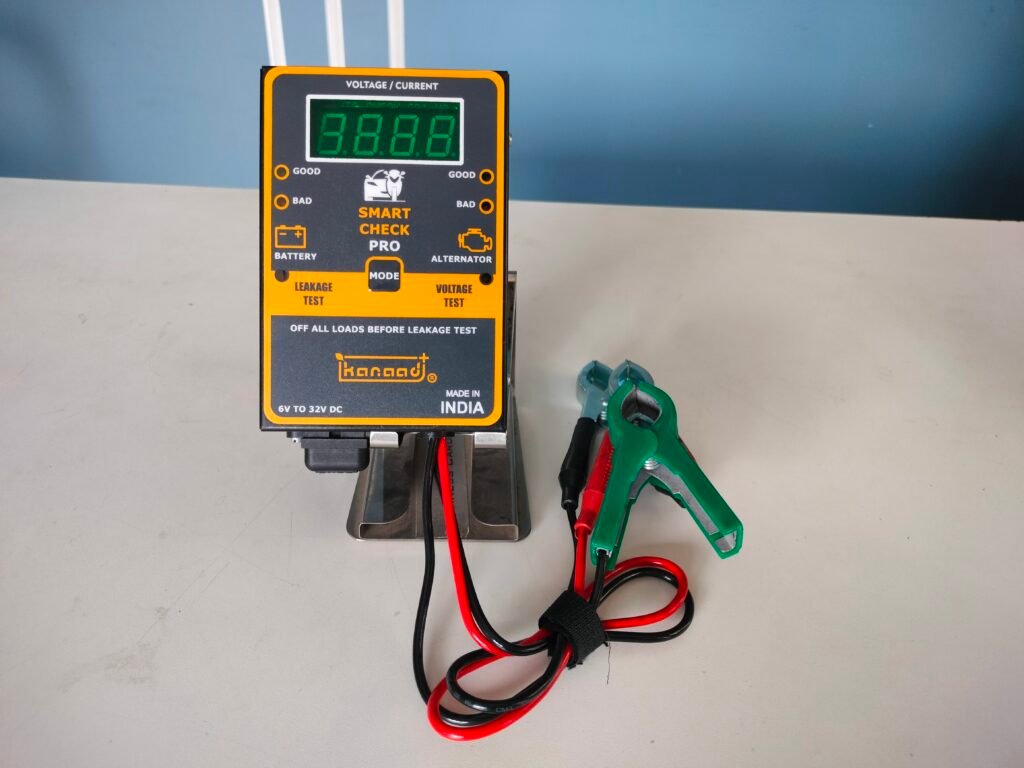
Search
Close this search box.
battery clip

Battery leakage current check meter

  • Battery Health Check
  • Alternator/Rectifier Check
  • Leakage Current Check:
  • MADE IN INDIA
SKU: ACM Category:

Download Product CatLog

Test your battery under real-world conditions. test your battery’s strength and get back on the road with confidence.

  1. Locate the switch on the smart tester that allows you to put it on smart check
  2. Connect the positive clip of the tester to the positive terminal of the
  3. Connect the negative clip of the tester to the negative terminal of the
  4. Turn on the vehicle ignition by pressing the start
  5. Look at the result displayed on the Battery health indicator . The result will show one of the following:
Battery Health Meaning
GOOD “Battery Health OK” means that the battery is in good condition.
WEAK “Battery Health Weak” means that the battery is weak and may need to be charged or replaced.
BAD “Battery Health Bad” means that the battery is in bad condition and needs to be replaced.

Note that battery test results may vary depending on factors such as the age of the battery, the usage pattern,

Alternator/Rectifier check

Check your rectifier and avoid overcharging or undercharging.”

  1. Locate the switch on the smart tester that allows you to put it on smart check
  2. Connect the positive clip of the tester to the positive terminal of the
  3. Connect the negative clip of the tester to the negative terminal of the
  4. Turn on the vehicle ignition by pressing the start
  5. Start your bike and accelerate it to full

Look at the result displayed on the Charging volt indicator . The result will show one of the following:

Charging volts Meaning
HI Overcharging battery, which may lead to battery damage or failure
OK Battery is charging normally and alternator/rectifier is in good condition
LOW Undercharging battery, which may cause the battery to not fully charge and eventually fail

Note that these results may vary depending on the type of rectifier and charging system being used. It’s always best to refer to the manufacturer’s instructions or consult a qualified mechanic if you’re unsure about the results of a rectifier test.

Leakage current check

“Avoid unexpected breakdowns: Detect and fix leakage currents before they drain your battery.”

Car Battery Leakage Test Procedure

  1. Turn off the vehicle and remove the key from the
  2. Locate the battery in the engine The battery is usually a rectangular-shaped box with two cables connected to it.
  3. Disconnect the negative (black) cable from the battery This will prevent any current from flowing through the system during the test.
  4. Connect the black CLIP of the Auto Check Meter to the negative terminal of the battery and the GREEN CLIP to the negative cable that you just removed.
  5. Put the Auto Check Meter switch in Leakage check
  6. Connect the red clip of the Auto Check Meter to the positive terminal of the battery to turn on the Auto Check Meter.
  7. Wait for the meter to stabilize and take a The reading should be zero or close to zero. If the reading is higher than normal, there may be a parasitic draw on the battery.
  8. To locate the source of the parasitic draw, start by removing one fuse at a time and observing the meter reading. When the reading drops, you have identified the circuit that is causing the parasitic draw.
  9. If you are unable to locate the source of the parasitic draw, you may need to seek professional
  10. When you are done, turn off the Auto Check Meter, reconnect the negative cable to the battery terminal, and start the vehicle.


Bike Battery Leakage Test Procedure

  1. Turn off the motorcycle and remove the key from the
  2. Locate the battery, which is usually located under the seat or behind a side
  3. Disconnect the negative (black) cable from the battery This will prevent any current from flowing through the system during the test.
  4. Connect the black CLIP of the Auto Check Meter to the negative terminal of the battery and the GREEN CLIP to the negative cable that you just removed. Put the Auto Check Meter switch in Leakage check mode.
  5. Connect the red clip of the Auto Check Meter to the positive terminal of the battery to turn on the Auto Check Meter.
  6. Wait for the meter to stabilize and take a The reading should be zero or close to zero. If the reading is higher than normal, there may be a parasitic draw on the battery.
  7. To locate the source of the parasitic draw, start by removing one fuse at a time and observing the meter reading. When the reading drops, you have identified the circuit that is causing the parasitic draw.
  8. If you are unable to locate the source of the parasitic draw, you may need to seek professional
  9. When you are done, turn off the Auto Check Meter, reconnect the negative cable to the battery terminal, and start the motorcycle.
Shopping Cart

Product Enquiry